Turn any image into a 3D-printed mosaic
Upload a photo, pick your filaments, and get print-ready STL files arranged across your build plates. Designed for Bambu Lab printers with multi-colour AMS.
Hex & square cells
Choose your cell shape and size. Hex cells give an organic look; squares tile cleanly.
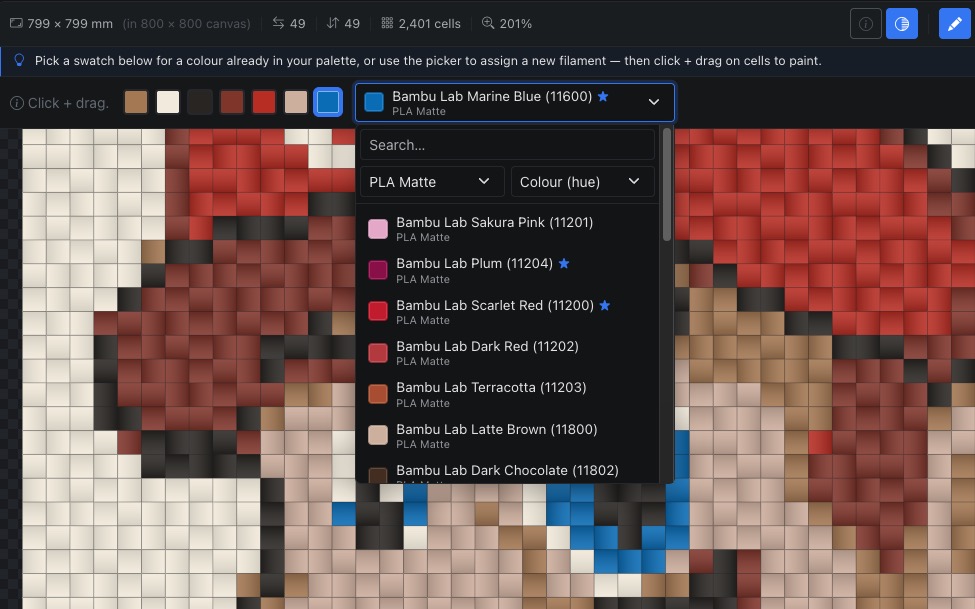
Filament library
Bambu Lab catalogue built in. Track owned, AMS-loaded, and wishlist filaments.
Multi-plate packing
Smart rotation and parity-flip packing across build plates. Minimal waste.
One-click STL export
Per-plate multi-colour STLs, ready for Bambu Studio. Each plate carries only its filaments.
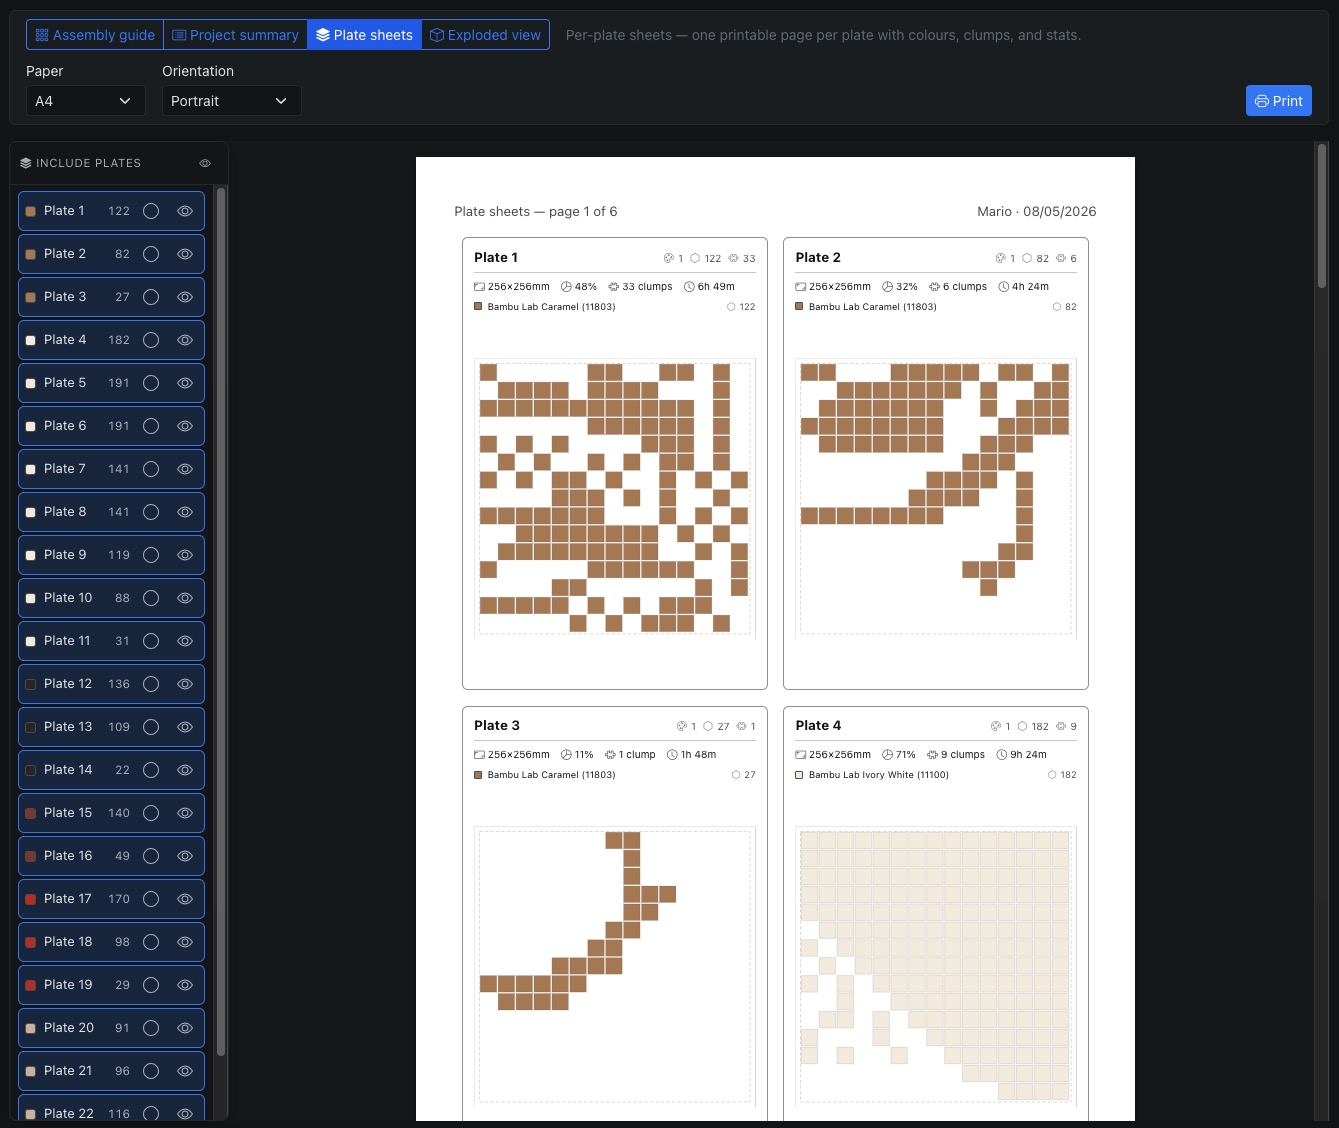
Assembly guide
Printable guide with plate numbers and clump boundaries for reassembly.
Mount & frame
Plan dimensions, acrylic backing, screws, and export a printable cut-list.
Live preview as you design
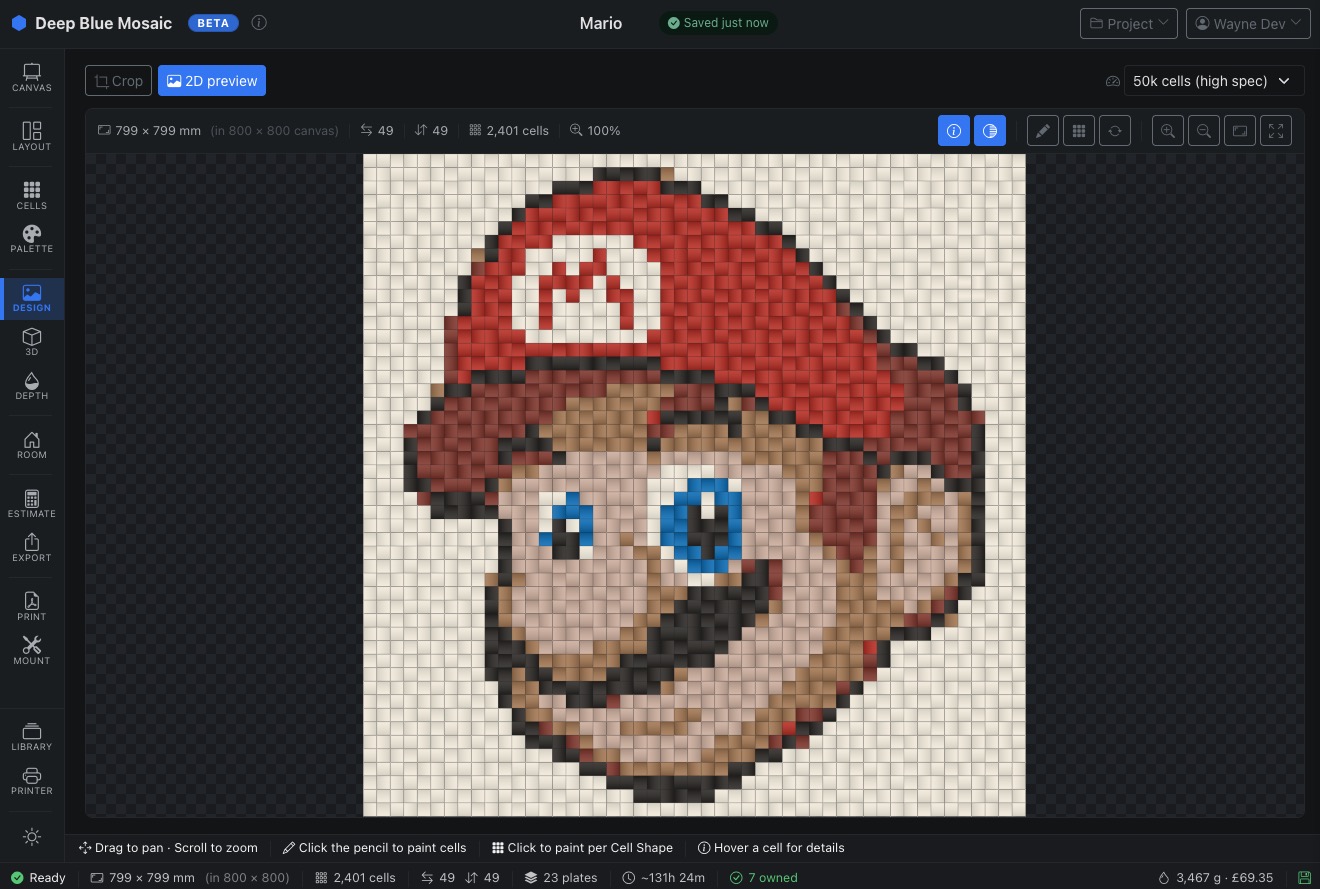
See your mosaic take shape in real time. Upload a photo or generate one with AI, then crop, resize, and adjust until the cell layout looks right. The canvas updates instantly as you change settings.
Fine-tune every cell
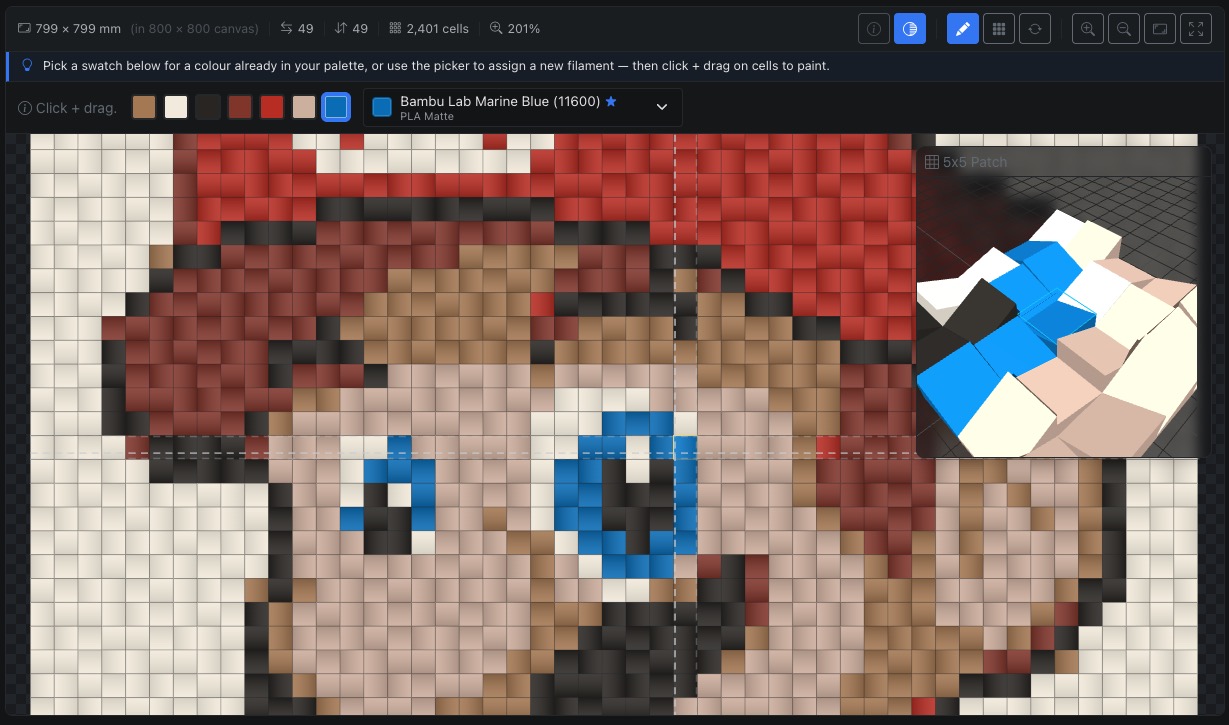
Paint individual cells, swap colours, erase, or fill regions. The cell editor gives you precise control over the final look before you commit to a print.
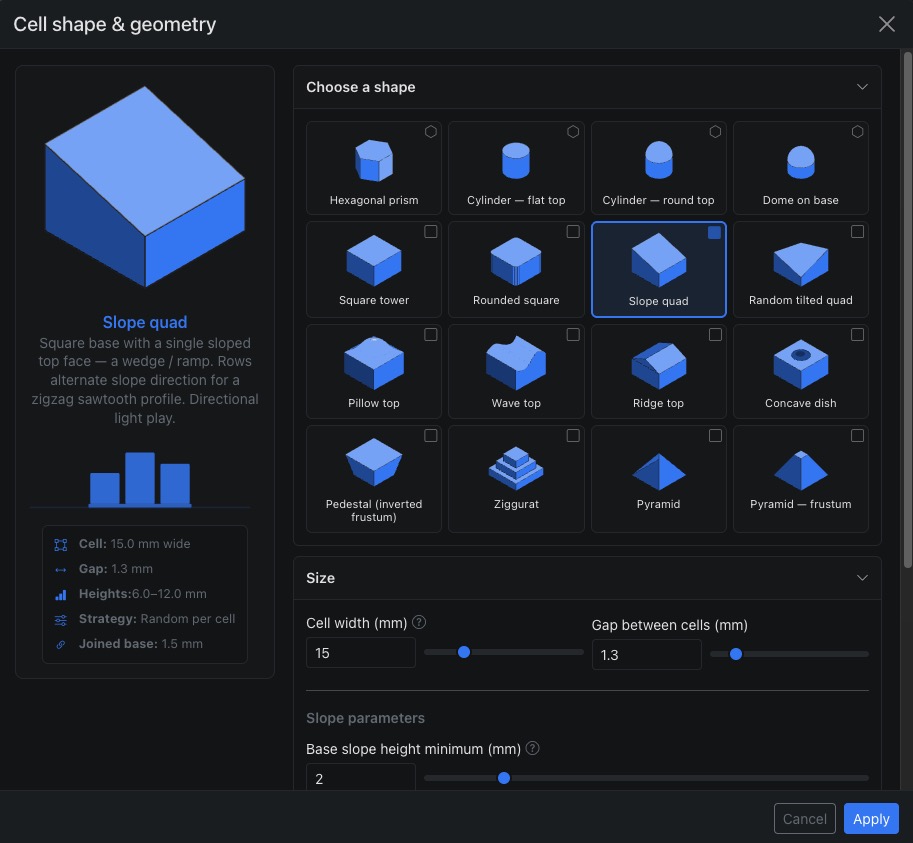
Hex or square — your choice
Hexagonal cells create a natural, organic mosaic. Square cells give clean, geometric lines. Switch between them at any time and see the result on the canvas immediately.
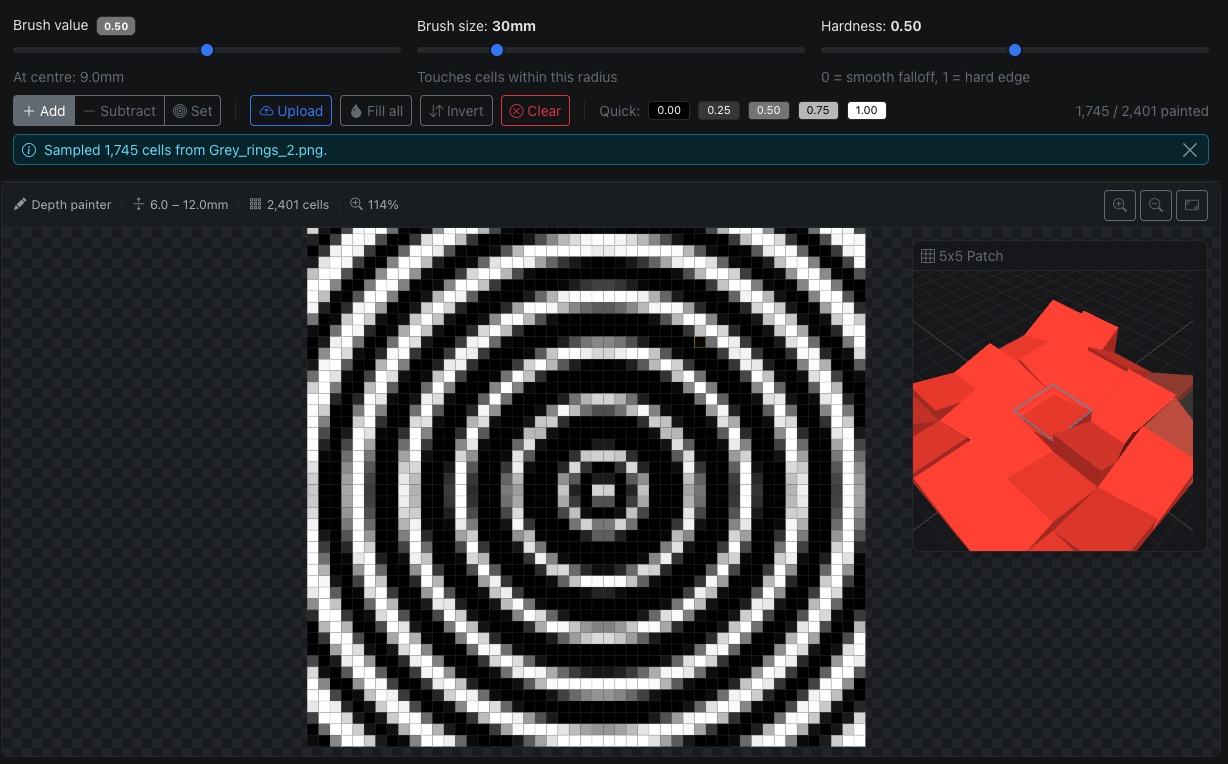
Add dimension with height & depth
Paint depth values onto individual cells to create a relief effect. Higher cells stand out; lower cells recede. The 3D preview shows the result before you export.

See it in three dimensions
An interactive Three.js viewer renders your mosaic as real 3D cells with accurate filament colours. Rotate, zoom, and inspect before committing to an export.
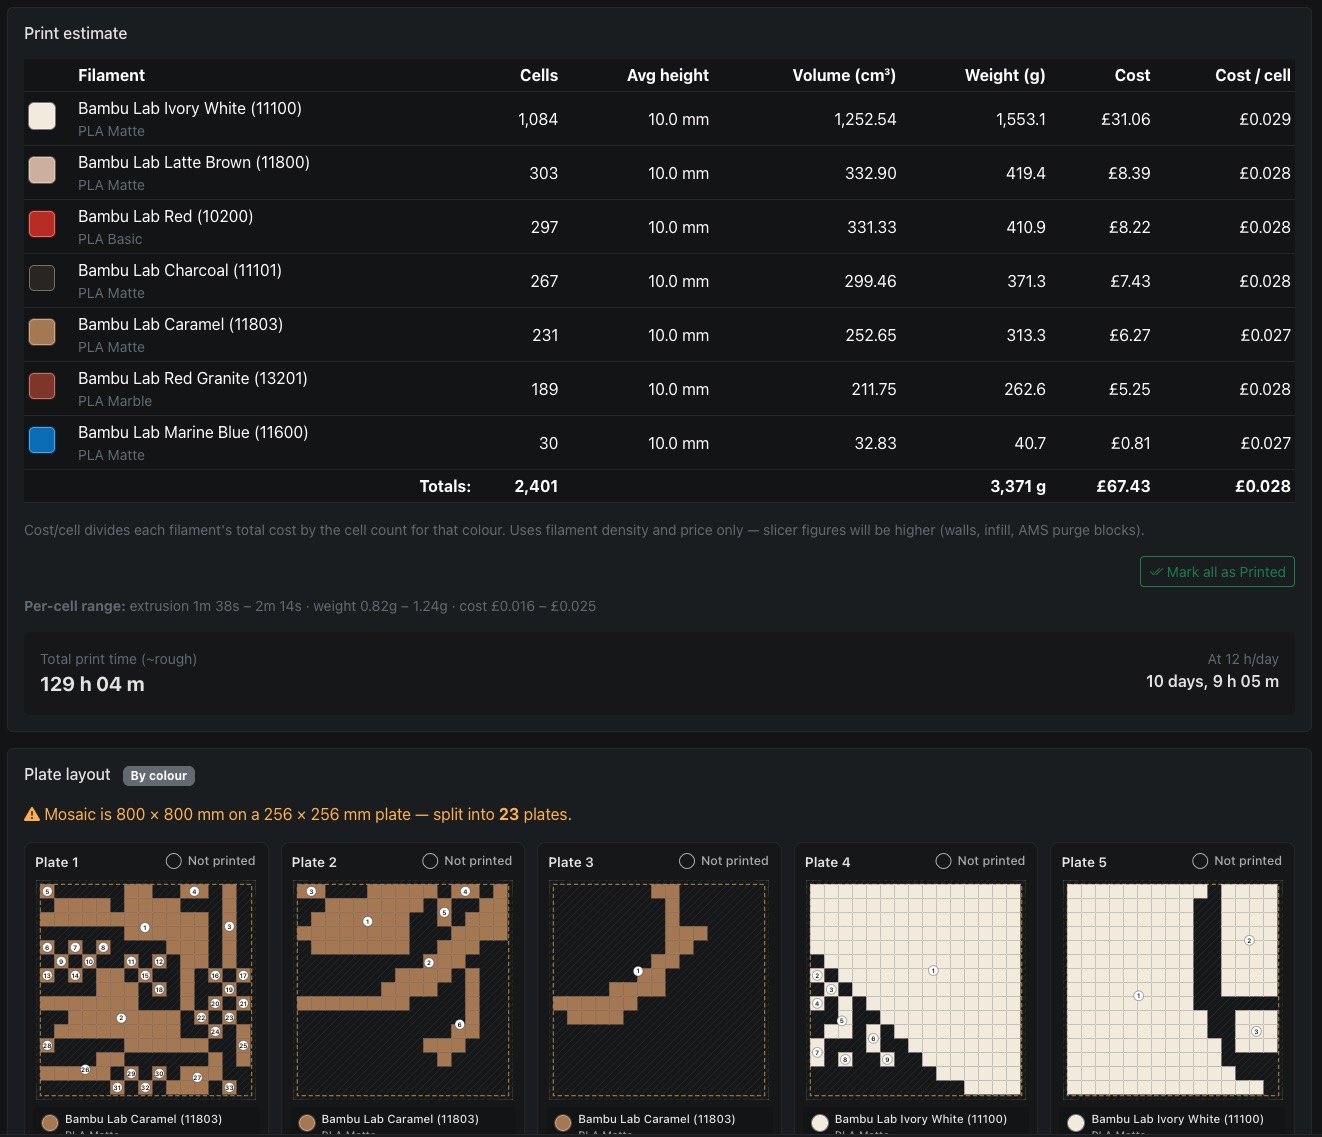
Know exactly what you need
See how cells pack across your build plates with filament-per-plate breakdowns, total plate count, and waste estimates. Adjust grid size or cell shape and the estimate recalculates live.
Control the stacking order
Drag filaments into the print sequence you want. The stacking order determines which colour sits on top where cells overlap at the edges, giving you full creative control.
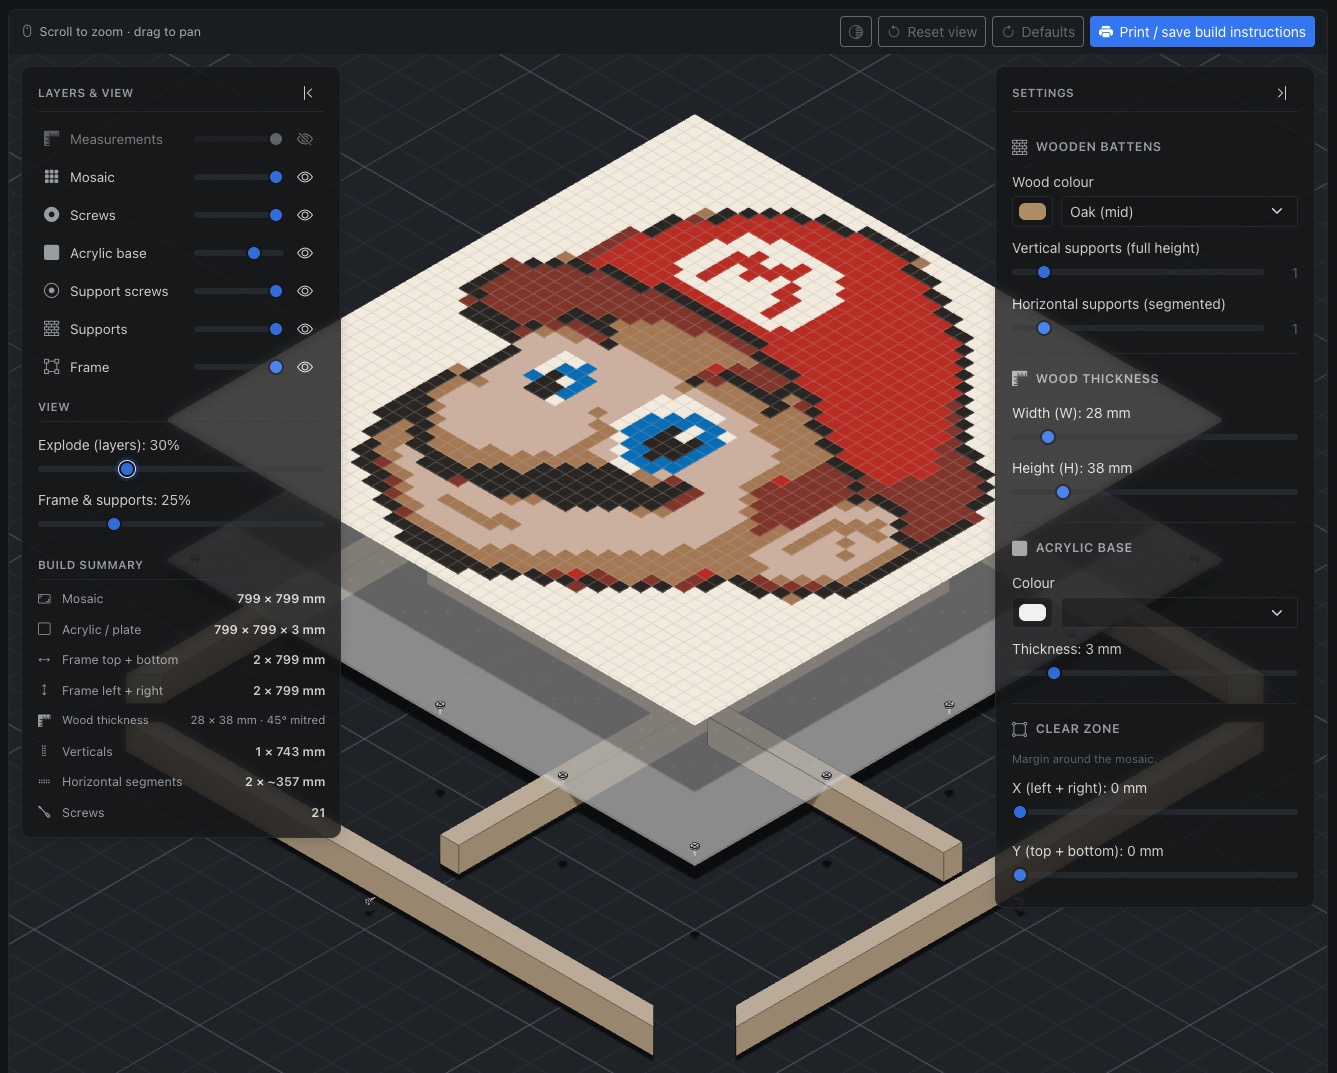
Plan the physical build
Configure frame size, acrylic backing, support rails, and screw positions. An interactive exploded 3D view shows every layer — frame, supports, acrylic, and mosaic — so you can see how it all fits together before cutting anything.
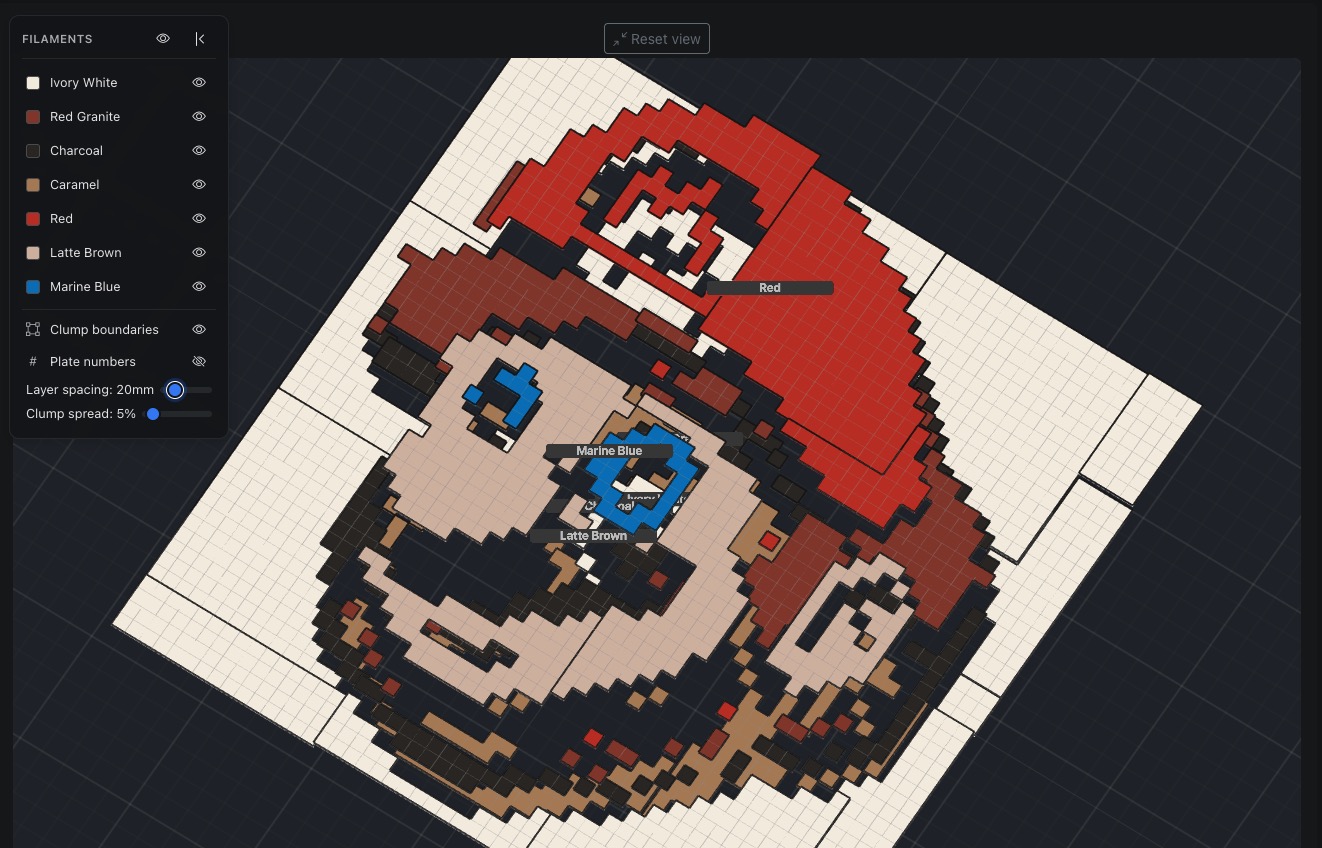
Understand every layer
The exploded view separates your mosaic by filament colour, then by individual clumps. Toggle layers, adjust spacing, and see plate numbers floating above each piece — ideal for planning assembly order.
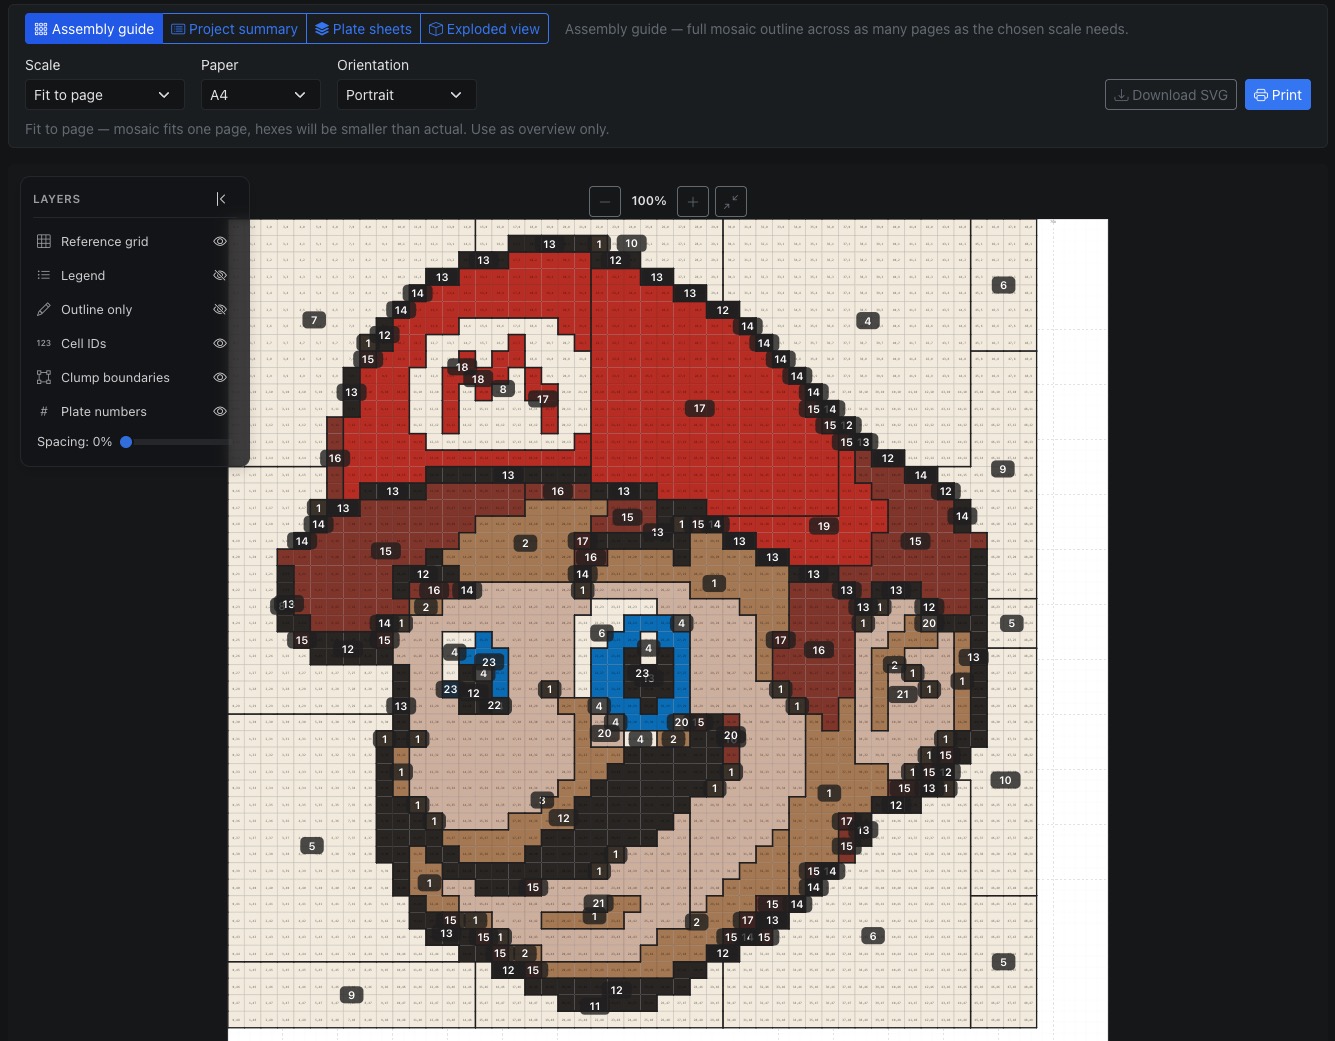
Printable step-by-step guide
A generated assembly guide shows the full mosaic, per-plate details, clump boundaries, and plate numbers. Print it out and follow along as you piece the mosaic back together.
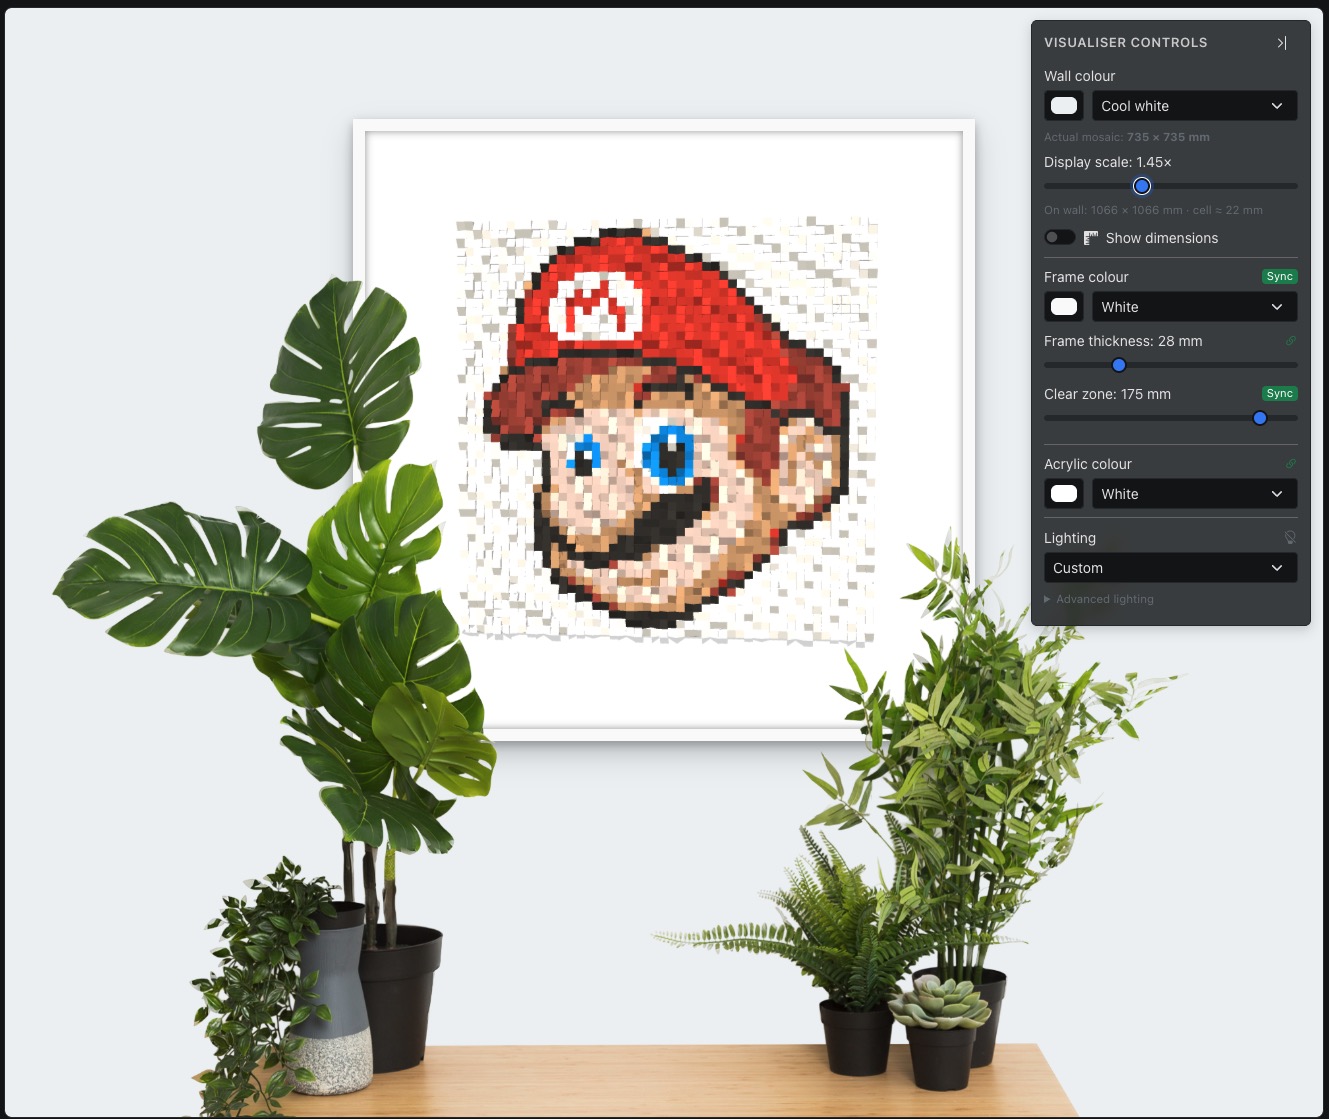
See it on your wall
Upload a photo of your room and place the finished mosaic on the wall at real-world scale. Adjust position and size to get a feel for how the piece will look before you start printing.
How it works
Upload an image
Drop in a photo or generate one with AI. Crop and adjust until it looks right.
Pick your palette
Choose filaments from the catalogue or your library. Assign them to your AMS slots.
Configure & export
Set cell shape, grid size, and plate layout. Export multi-colour STL files ready for Bambu Studio.
Print & assemble
Follow the assembly guide to piece the printed clumps back into a finished mosaic on the frame.
Ready to build something?
Hex or square cells. Any image. Any scale. Your filaments, your printer, your art.